These steps will show you how to set up the TrustistTransfer Xero Open Banking integration, which will allow you to use TrustistTransfer via your Xero invoices.
Copy your custom Xero URL from TrustistTransfer
#
You can find your custom Xero URL within your TrustistTransfer account. This URL will be needed later to configure Xero to offer TrustistTransfer as a payment option.
Log in to your TrustistTransfer account, navigate to the settings page and scroll down to “Xero Custom Invoice URLs” section. They copy the URL from the Client Secret field.

Configuring your Xero Open Banking Integration
#
These steps only need to be completed once per business in your Xero account. Once set up, all future invoices will include TrustistTransfer as a payment option.
Step 1 – Access Online Payment Settings Within Your Business
#
Log in to your Xero account, click on the ‘Sales’ tab at the top of the page, then select ‘Online payments’ from the drop down of options.

A new page will appear. Click ‘Add a new service’ on the new options that will appear.

Step 2 – Add a New Payment Service
#
Depending on your existing settings in Xero, you’ll either have an option at the top of your page to ‘Add a new payment service’ or you’ll need to scroll down the page until you see the ‘add another online payment option’ link. This might be under other payment services, as in the image below.

Step 3 – Choose Custom Payment URL
#
Select the option for ‘Custom Payment URL’ and click ‘Continue’.

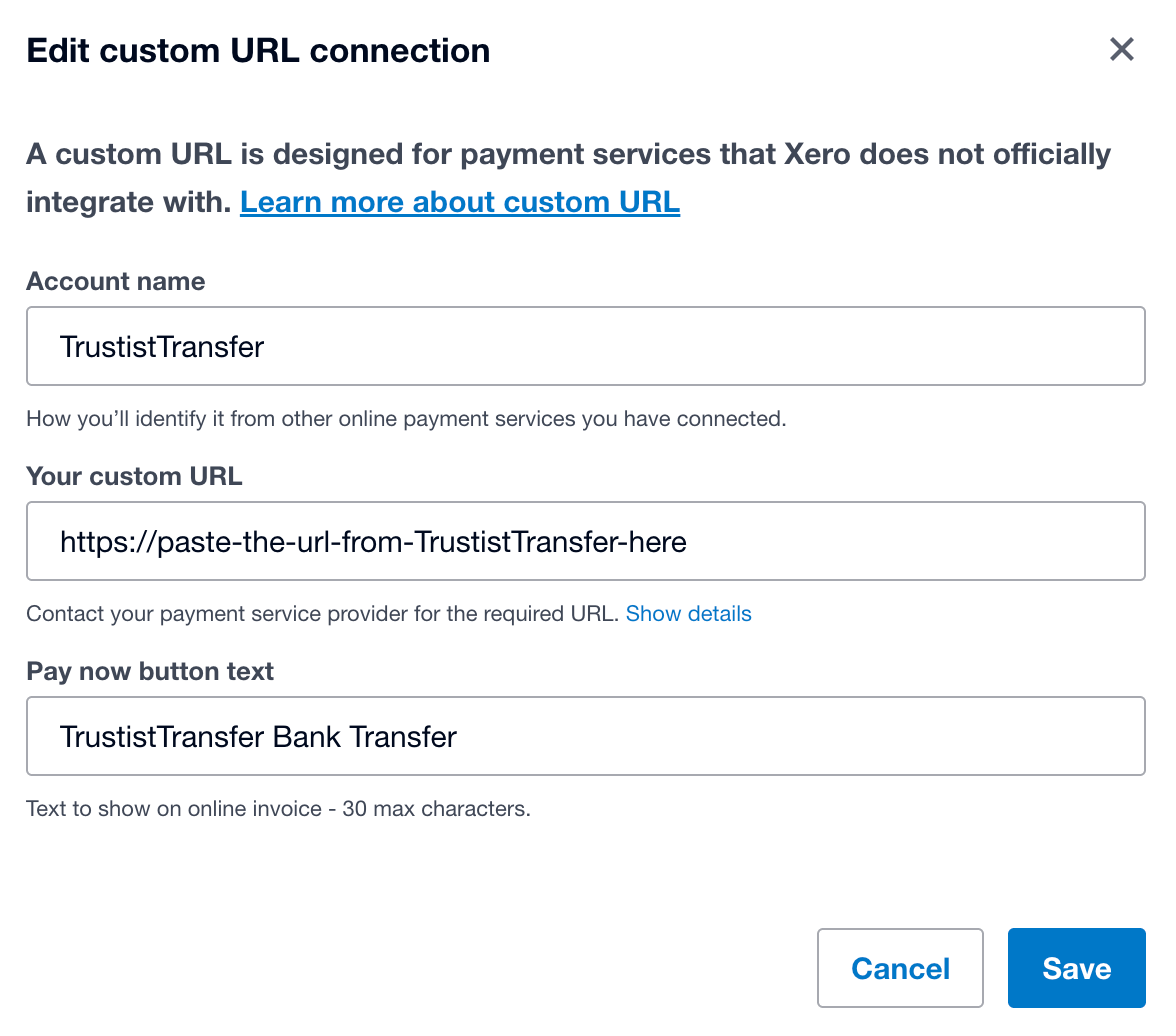
Step 4 – Enter Your TrustistTransfer Details
#
Enter the information required, as shown below. Your custom URL can be found within the settings of your TrustistTransfer account.

Configuring your invoices
#
Step 1 – Access the Invoice Editor
#
Navigate to the editing area for the invoice you’d like to add TrustistTransfer to. Above the ‘Online payments’ section there should be an option to add a new method.

Step 2 – Select TrustistTransfer
#
Select the TrustistTransfer option and click ‘Save’.

Step 3 – Confirm Payment Option on Invoice
#
The option to pay online should now appear on your invoice.
You may need to change the online payment service applied to the branding template your invoice is using, this can be done in your Xero settings.

Step 4 – Customer Payment Experience
#
When a customer clicks on the option to pay online, they’ll first be redirected to a Xero page showing the invoice. This will then give them the option to proceed with the payment via TrustistTransfer – once this button is clicked, the customer will be taken through the usual TrustistTransfer payment journey.


